In the journey toward independence, one of the most vital skills a young person can acquire is financial literacy. Understanding how to manage money effectively isn’t just about saving up for a new game or a concert ticket; it’s about laying a robust foundation for future financial stability, smart decision-making, and ultimate freedom. For many teenagers, the world of income, expenses, and savings can seem daunting, a complex maze of numbers and choices.
However, it doesn’t have to be intimidating. With the right tools and a clear, actionable approach, mastering personal finance can become an exciting, empowering adventure. This is precisely where a Simple Budget Planner Good Sample Budget Template For Teenager comes into play, offering a straightforward path to understanding where money comes from, where it goes, and how to make it work harder for you. It’s about equipping young individuals with the confidence and skills they need to navigate their financial landscape now and well into adulthood.
Why Financial Literacy Matters for Young Adults
Learning to manage money early in life offers unparalleled advantages. It’s more than just knowing how to count cash; it’s about developing a mindset of responsibility, foresight, and self-control. Teenagers who grasp fundamental budgeting concepts are better prepared for the real world, whether it’s saving for college, a first car, or even just managing weekly allowance and part-time job earnings. This foundational knowledge helps prevent future debt, promotes informed spending habits, and builds confidence in making financial decisions.
Moreover, financial literacy empowers young people to set and achieve significant goals. When a teenager understands the direct link between saving and purchasing a desired item, or how consistent contributions can grow over time, they learn patience and the value of hard work. This understanding translates into practical skills like comparing prices, understanding contracts, and recognizing the difference between needs and wants – all critical lessons that will serve them throughout their lives. It transforms abstract concepts into tangible progress towards their aspirations.
The Power of a Well-Structured Budget Planner
At its core, a good budget planner is a roadmap for your money. It helps you visualize your financial situation, make conscious choices about your spending, and ensure you’re moving towards your financial goals. For a young person, a simple budget planner for teens provides clarity in what might otherwise feel like chaotic finances. It breaks down complex financial concepts into manageable steps, making the entire process less overwhelming and more accessible.
Using a dedicated financial planning tool for young adults helps demystify income and expenses. It’s an invaluable educational resource that allows teenagers to see, often for the first time, exactly where their money is going. This transparency is crucial for developing good habits. When a teen actively tracks their spending and income using a reliable budget template for teenagers, they gain a tangible sense of control and responsibility over their own funds, fostering a sense of accomplishment and independence.
Key Components of an Effective Teen Budget Template
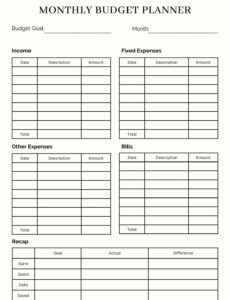
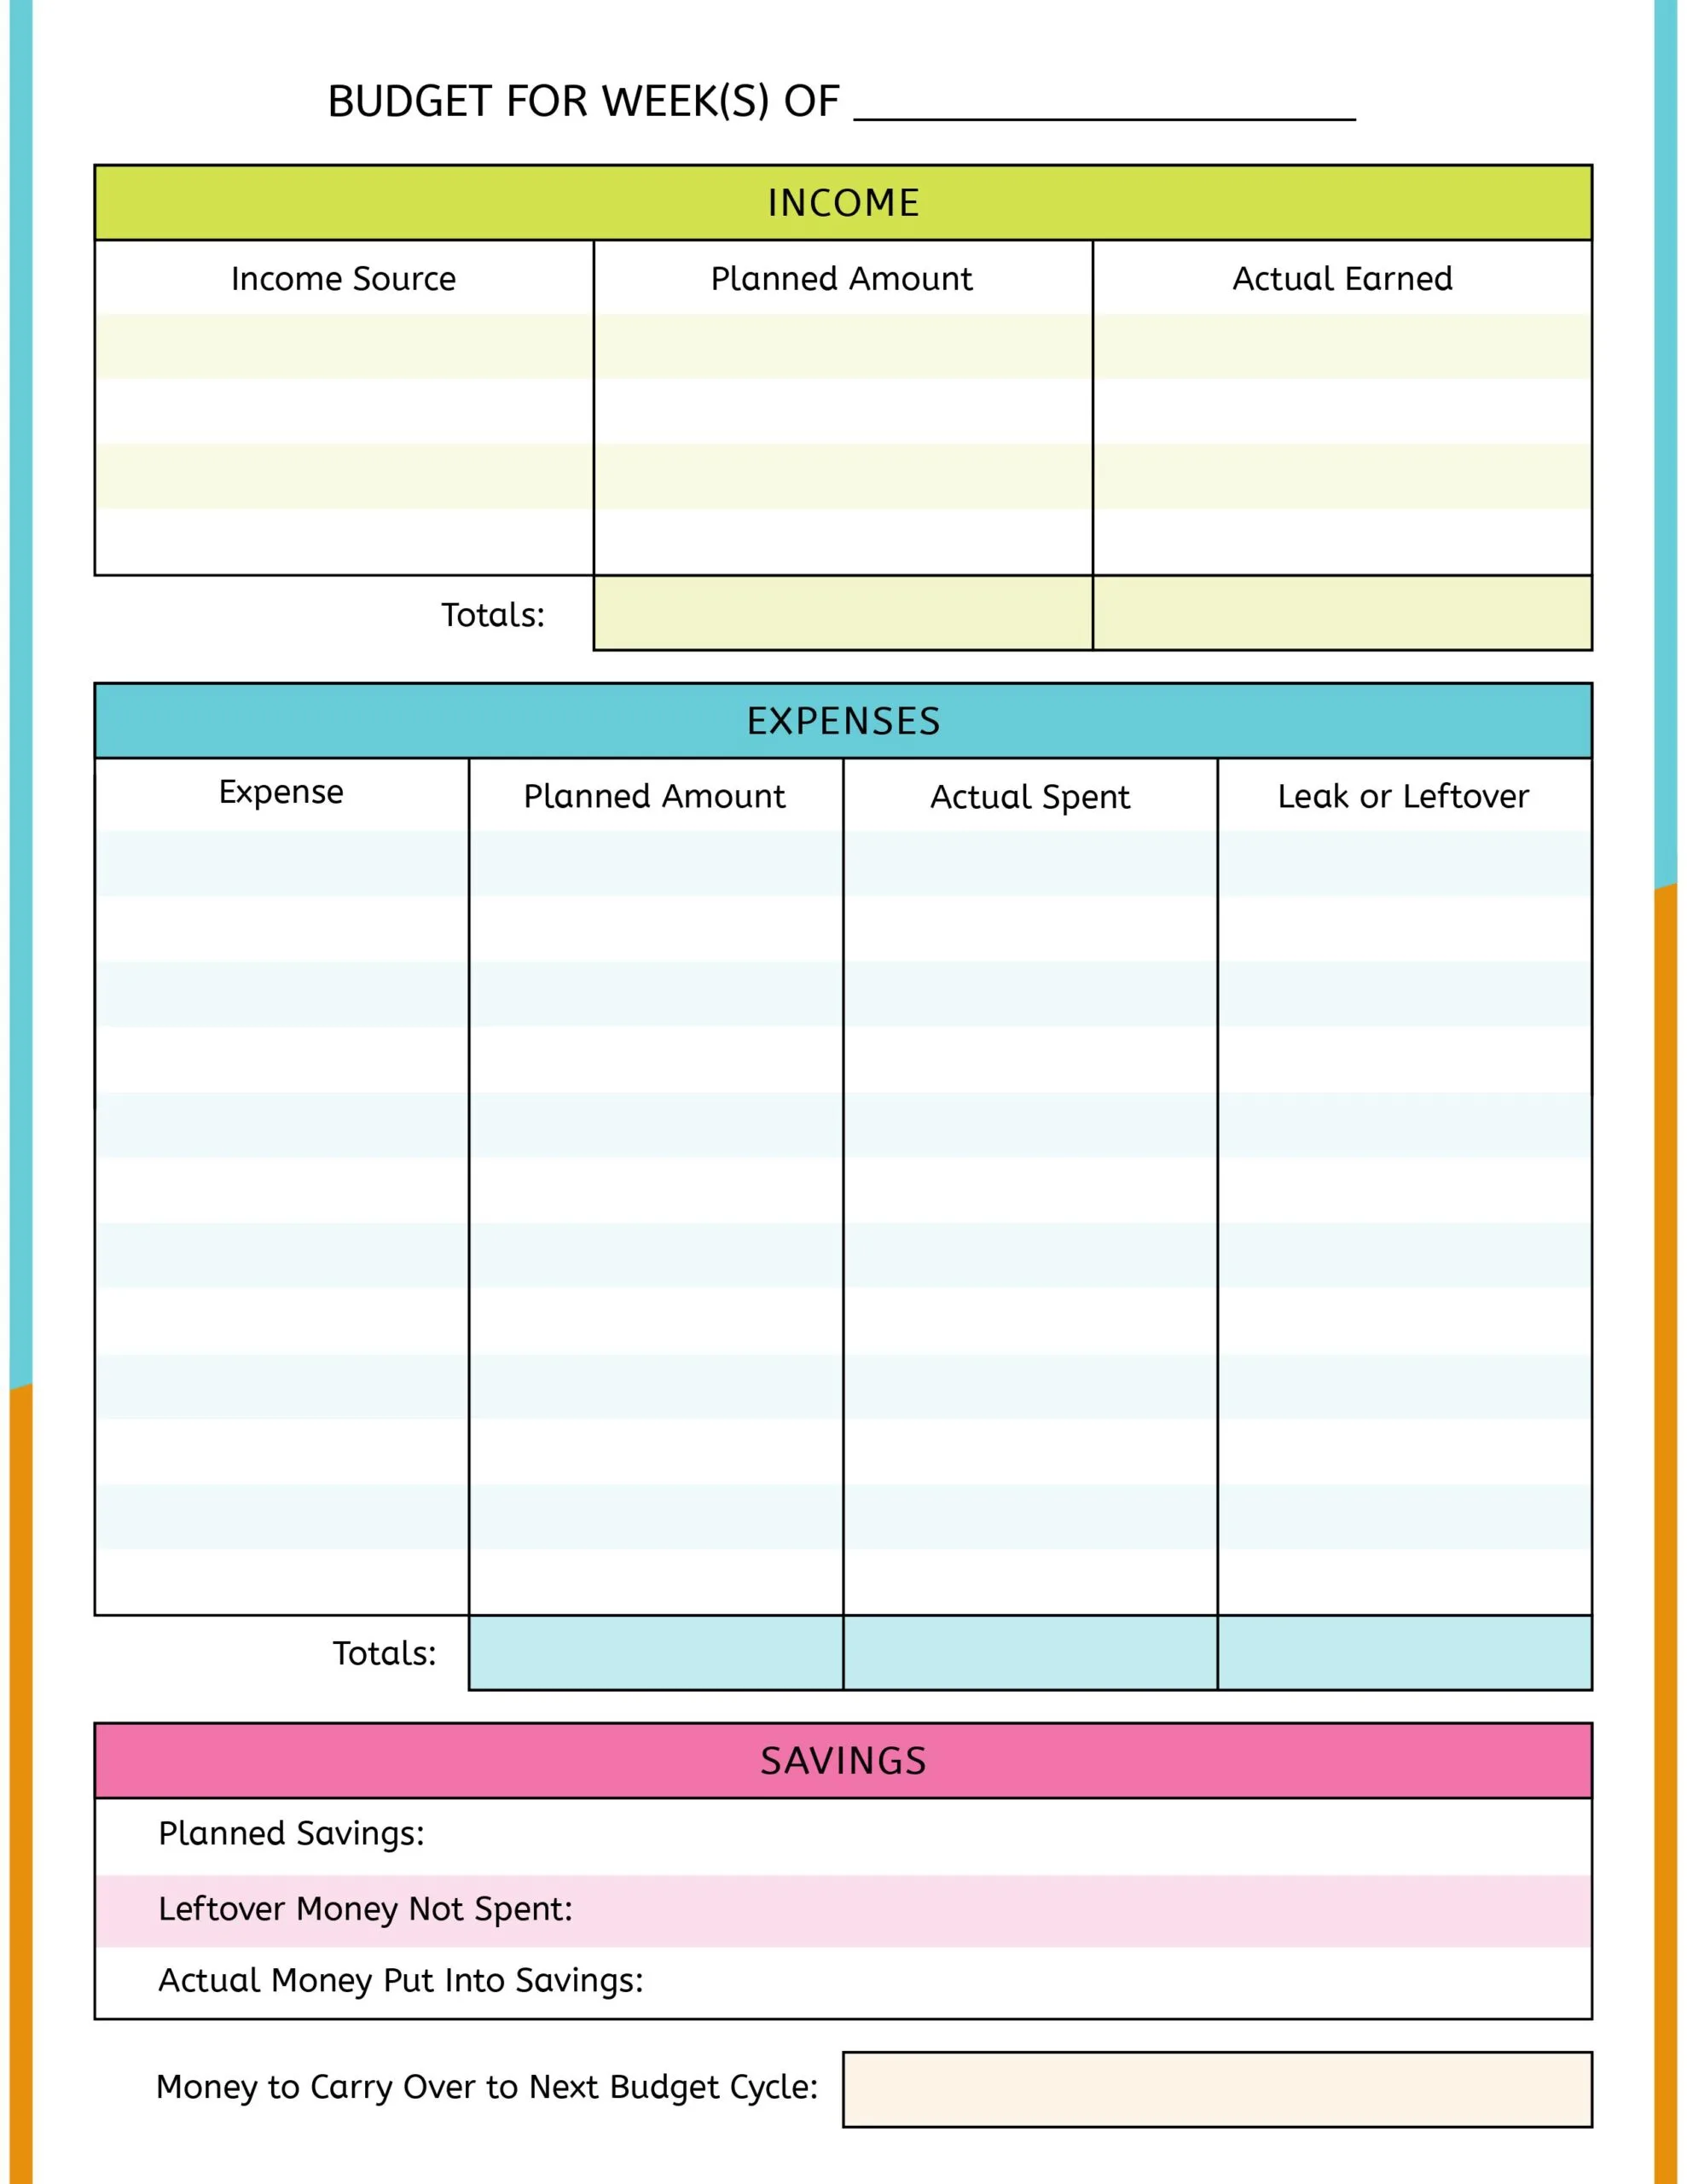
An effective budget template doesn’t need to be overly complicated. Its strength lies in its clarity and ease of use, especially for a young user. A good sample budget for a teenager should break down finances into understandable categories, allowing for easy tracking and analysis. Here are the essential elements:
- **Income Sources:** This section lists all the money coming in. For teenagers, this might include their weekly or monthly **allowance**, earnings from a **part-time job**, money received as **gifts**, or even occasional earnings from **chores or odd jobs**. Clearly identifying income helps a teen understand their total financial capacity.
- **Fixed Expenses:** These are costs that typically stay the same each month and are often non-negotiable. Examples for a teenager could be a **phone bill contribution**, a **subscription service** (like music or streaming), or regular contributions to a **school activity** or club. Understanding fixed costs is important for determining disposable income.
- **Variable Expenses:** Unlike fixed expenses, these costs fluctuate. This category is where a lot of spending occurs and where a teenager has the most control. Common variable expenses include money spent on **entertainment** (movies, arcade games), **dining out** with friends, **shopping for clothes**, or **transportation** (gas, bus fare). Tracking these helps identify spending patterns.
- **Savings Goals:** This is arguably the most crucial component for long-term financial health. Teenagers should allocate a portion of their income to specific savings goals, such as saving for a **new gaming console**, a **college fund**, a **driver’s license**, or even just an **emergency fund**. Setting clear goals provides motivation to stick to the budget.
- **”Wants” vs. “Needs”:** A good budget template will often encourage users to distinguish between these two categories. **Needs** are essential for daily life (e.g., lunch money, transportation to school), while **wants** are non-essential items that enhance enjoyment (e.g., new video games, specialty coffee). This distinction is fundamental for prioritizing spending and making smart choices.
Getting Started: Customizing Your Budget
The beauty of a sample budget template for teenagers is its adaptability. It serves as a starting point, which you can then tailor to your unique financial situation and goals. The first step in creating your personalized spending plan is to gather all relevant financial information. This means knowing your regular income, any recurring bills, and an estimate of your usual spending habits. Don’t worry if you don’t have perfect numbers initially; the goal is to get a clear picture over time.
Begin by tracking your income and expenses for at least a month without judgment. This initial phase, often called a "spending audit," will reveal exactly where your money is going. Use your chosen youth budgeting tool to categorize every dollar earned and spent. After a month, review your data. Are you spending more than you earn? Are there areas where you could cut back to reach a savings goal faster? This is where you adjust your budget, making conscious decisions about where your money should be allocated in the future. Remember, an easy budgeting solution for adolescents should feel empowering, not restrictive.
Practical Tips for Budgeting Success
Making a budget is one thing; sticking to it is another. Sustaining good money habits requires discipline and smart strategies. Here are some tips to help any young person succeed with their financial planning:
**1. Be Consistent:** Regularity is key. Whether you check your budget daily, weekly, or bi-weekly, establish a routine and stick to it. This keeps you aware of your financial standing and prevents surprises.
**2. Track Every Dollar:** It might seem tedious at first, but recording every income source and every expense, no matter how small, provides the most accurate picture of your finances. Many apps or simple spreadsheets can make this process quick and easy.
**3. Set Realistic Goals:** Don’t expect to save hundreds of dollars overnight if your income is limited. Start with achievable savings goals, and as you gain confidence, you can aim higher. Realistic goals prevent frustration and encourage perseverance.
**4. Review and Adjust:** Your life and financial situation will change. Your budget should too. Periodically review your spending habits and income, and don’t hesitate to adjust your budget categories or goals as needed. A flexible budget is a sustainable budget.
**5. Involve a Trusted Adult:** Talk to a parent, guardian, or mentor about your budget. They can offer valuable advice, help you stay accountable, and provide insights into managing money as a teenager that you might not have considered.
**6. Reward Yourself (Responsibly):** Budgeting doesn’t mean never having fun. Plan for small rewards when you hit a savings milestone. This positive reinforcement can keep you motivated and remind you that budgeting leads to enjoyable outcomes.
Addressing Common Teen Budgeting Challenges
Even with the best intentions, teenagers can face unique hurdles when it comes to managing their money. Peer pressure is a significant factor; seeing friends spend freely can make sticking to a budget difficult. Unexpected expenses, like a forgotten concert ticket or a sudden need for a school project material, can also throw off a carefully planned budget. Motivation can wane, especially if savings goals feel far off.
To overcome these challenges, a flexible approach is crucial. Teach yourself to distinguish between impulse buys and planned purchases. If peer pressure is an issue, consider suggesting free or low-cost activities with friends, or simply budget a specific amount for social outings. For unexpected costs, an emergency fund, even a small one, can be a lifesaver. Regular check-ins with your budget will help you regain focus if motivation dips. Remember, a step-by-step budget for teens is a tool for empowerment, not a strict rulebook designed to make you feel deprived. It’s okay to make mistakes; the important thing is to learn from them and adjust.
Frequently Asked Questions
How often should a teenager review their budget?
It’s recommended that teenagers review their budget at least once a week. A weekly check-in allows them to track recent spending, update income, and ensure they are on track for their monthly goals. A more thorough review once a month can help adjust the overall plan.
What’s the difference between “needs” and “wants” in a teen budget?
“Needs” are essential expenses required for daily living, such as money for school lunches, essential transportation, or basic hygiene products. “Wants” are non-essential items that enhance enjoyment but are not crucial, like entertainment subscriptions, designer clothes, or frequent coffee shop visits. Distinguishing between them helps prioritize spending.
Can parents help with a teenager’s budget?
Absolutely! Parental involvement can be incredibly beneficial. Parents can offer guidance, help identify income and expense categories, provide insights into financial decision-making, and offer accountability. This collaboration helps foster open communication about money.
Is it okay for a teenager’s budget to change?
Yes, it is perfectly normal and even expected for a teenager’s budget to change. Life circumstances, income levels, and financial goals evolve. A good budget is flexible and should be adjusted periodically to reflect current realities and aspirations.
What’s the easiest way to track expenses?
The easiest way to track expenses often depends on personal preference. Some teenagers prefer using a simple notebook, while others find digital apps or spreadsheets more convenient. The key is to choose a method you will use consistently. Many banking apps also offer expense categorization tools.
Embracing financial management at a young age through a robust yet simple budget planner empowers teenagers with practical skills that will last a lifetime. It transforms potentially overwhelming concepts into clear, actionable steps, building confidence and fostering a sense of independence. By understanding their income, controlling their spending, and actively working towards savings goals, young people are not just managing money; they are investing in their future selves.
So, whether you’re saving for a significant purchase, preparing for college expenses, or simply aiming to understand your weekly allowance better, utilizing a dedicated financial literacy tool for young people is the smartest first step. It’s an opportunity to learn by doing, to make informed choices, and to build a strong financial foundation that will support every dream and aspiration as you grow. Start your budgeting journey today and unlock the power of smart money management.